Physical Address
304 North Cardinal St.
Dorchester Center, MA 02124
Physical Address
304 North Cardinal St.
Dorchester Center, MA 02124

How patience and sunny day made what I thought the total furniture was going well. Read to see how colored The cabinet base I recently fit He went out and now looks like in his new home in the guest room in my home.

Here’s a photo of the cabinet taken a few days after I finished it with a citrestrip. It was stain and gray.
I was not satisfied with the color removal results, plus if you read the post, I forgot that I added a white MDF Bayboard covering around the cabinet when I made it and an identical closet to my work table for my own Studioffice / Craft Room. Cannot color reminiscent of wood.
I knew I could lie a base to remind the natural layout of the tree I was after, but the final end of the cabinet was simply not comfortable.
After a few days of thinking about what I could do, I was thinking about putting the closet in the sun.
The reader also suggested that and it wasn’t to lose anything, so I went to it.

Early one morning last week I moved the closet from the room and on the upper deck of the house and left it sat on the bright warm sun all day.

Late in the afternoon I could not believe how better he looked at the tree, especially the top and left. Gray and dark spots are gone! The sun has dried the wood completely and turned on the dark spots.

I first mixed a few colors of the acrylic cramping color I had together to create a warm yellow shade.

I used a wide brush for a chip to inflict color in a long horizontal move over a white phase to create a grain start. I let this layer of paint dry completely.

When the yellow coat was SUV, I mix the brown color with clear mixing of the glaze. This is cheap and can be purchased when descending or any color shop.
If you are not familiar with what is afraid of glazes and how you allow you to create fault finish, read this post: All about fake pictures with colored glaze

I used the same wide chip brush and caused a layer of brown color / glaze per piece in a long horizontal move over each side. Then I used a clean brush for the chip and crossed the layer to exhibit some yellow basic color. I let this dry.

Once that coat was dried that I was tired once more in a brown brown color / glaze and wiped it on a paper towel. He then restarted the horizontally along the base plate to create a little more grain and color that would become close matches to the cabinet.

Here’s how the finished cabinet looks at the room. I added that the vintage drawer pulls and found the original door buttons in my color hardware door for cabinets and lockers.
The bed in the room blocks the light and creates a shadow at the bottom of the closet, so the lower half looks darker in this photo.
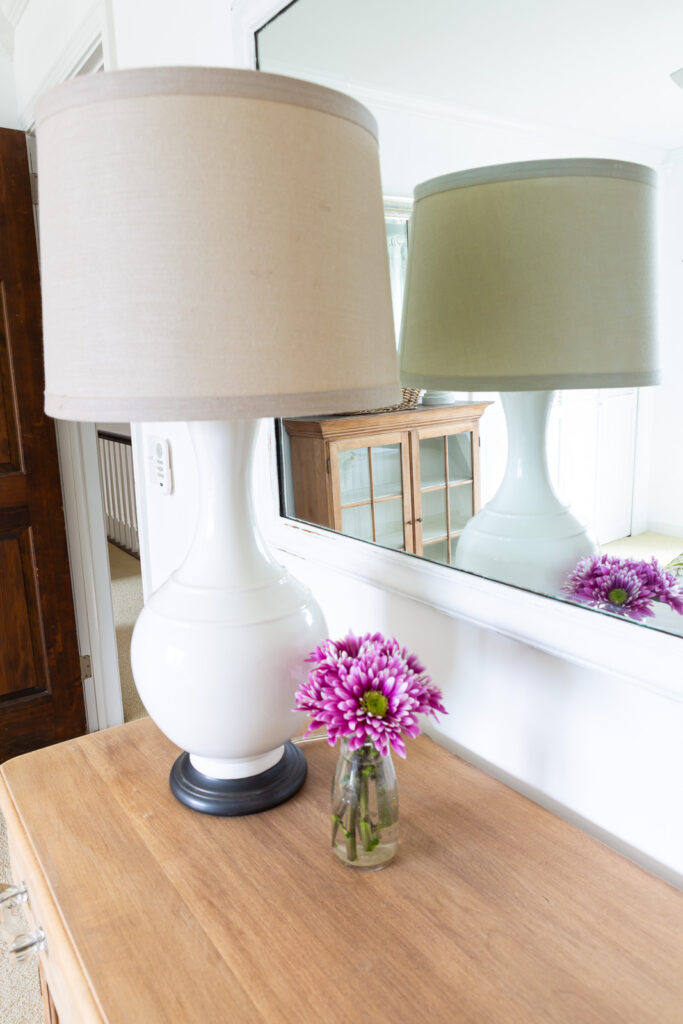
The sun was the key to obtaining a color and the general layout of the tree I wanted to achieve. That, of course, made me very happy because it will see the guests who stay in the room will see and ask their stuff.
The main reason I wanted to take off the color from this cabinet was so that it would be harmonized with his top. Yes, there is a top piece that I use separately in the room as a glass front sideboard. You can see it in the reflection of the mirrors.
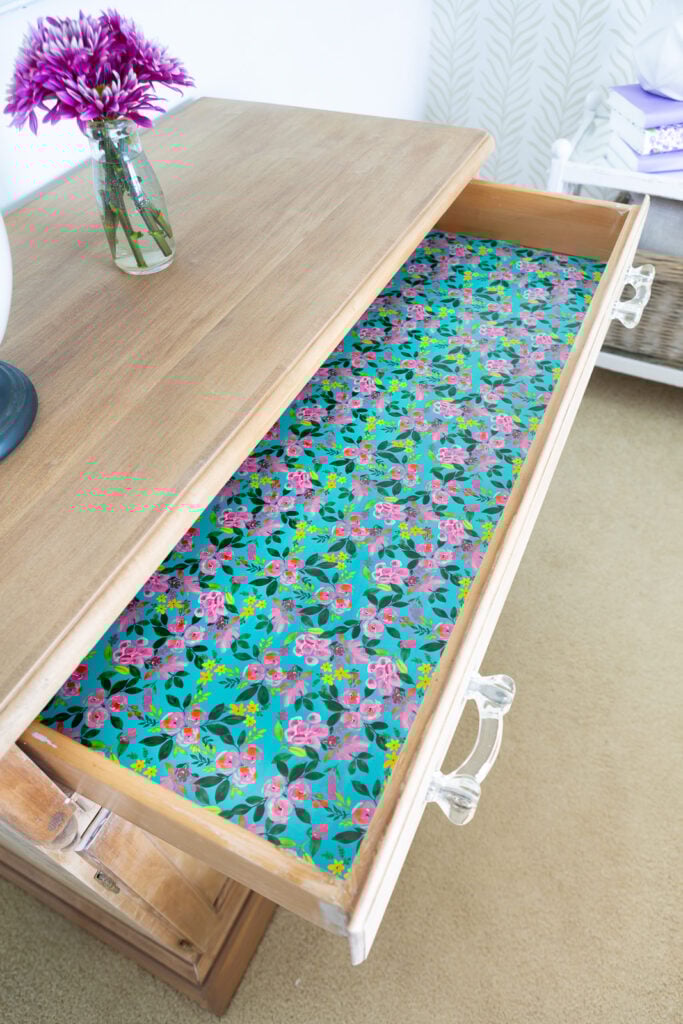
To add a pop color in the cabinet, I covered the flower gift for wrapping guests when they open the drawer to set their things in. To learn how to do it, see this post: An easy way to lynch drawer

Completion may not be exactly what I was looking for, but it came as well when I took time to work through some fixed practice after inital color removal has provided unsatisfactory results.